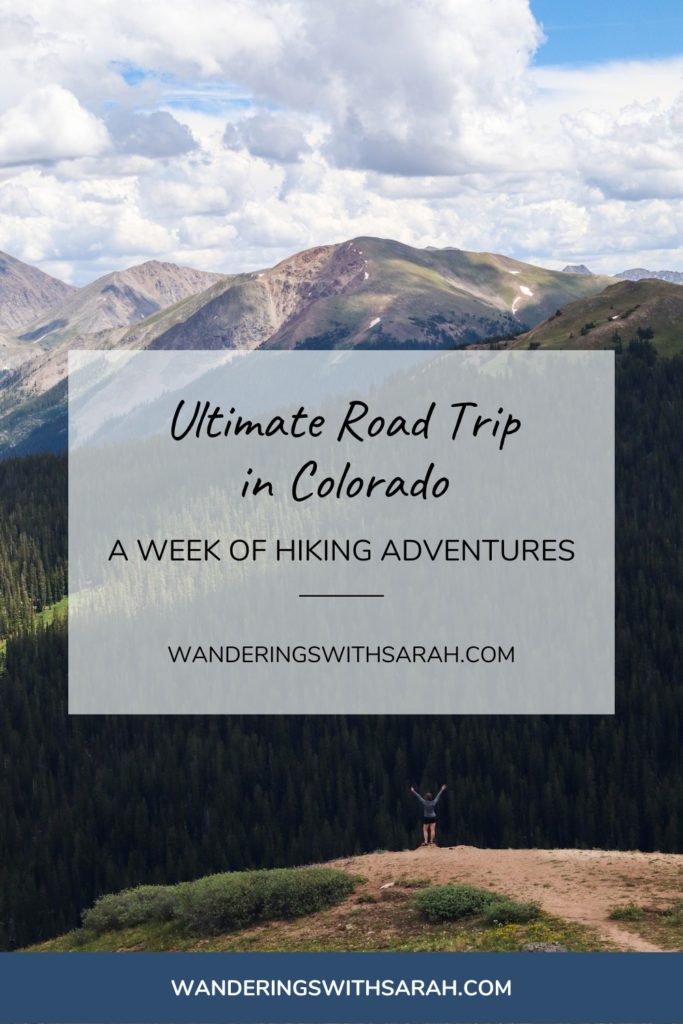
Are you dreaming of the ultimate road trip in Colorado where you can camp and hike to your heart’s content? Look no further!
In July of 2022, two friends and I packed up a Dodge Journey and drove all the way from Michigan to Colorado for one of the best hiking trips I’ve ever been on. Follow along on our itinerary as we hike and camp our way through Idaho Springs, Aspen, Glenwood Springs, Estes Park, and so much more!
And if you’re coming from sea level or low elevation—there’s no need to worry! So were we, so this trip had light acclimation days built in to ensure that altitude sickness wouldn’t slow us down.
Table of Contents
- Preparing for a Road Trip in Colorado
- Day 1: Arrive in Colorado + Black Hawk
- Day 2: Old Dillon Reservoir Trail + Independence Pass
- Day 3: Hanging Lake Trail + Rifle Falls State Park
- Day 4: Maroon Bells + Basalt
- Day 5: Saint Mary’s Glacier + Boulder Falls
- Day 6: Hiking in Rocky Mountain National Park
- Day 7: Driving Old Fall River Road + Trail Ridge Road in RMNP
- Colorado Road Trip Cost Breakdown
- Locations and Hikes for this Road Trip in Colorado
Preparing for a Road Trip in Colorado
Packing List
On this trip we stayed at a motel one night but spent the rest of our nights camping. If you sign up for my monthly newsletter, I’ll send you a FREE Camping List to help you prepare. Click the link here to get yours!
Camping Gear Recommendations
- Coleman Skydome Tent* (4 person is best for 2-3 people)
- Klymit Static V Sleeping Pad*
- Kelty Tuck 0 Sleeping Bag (works great even during the summer if you run cold)
- OmniCore Designs Mil-Spec Compression Stuff Sack* (I use this for my sleeping bag)
- Fenix Lantern* (very bright, but super compact for backpacking as well)
- Core 100 Lumen LED Tent Lantern*
I would also recommend shopping ahead of time for most of your food. You’ll want plenty of granola bars, snack food, electrolytes, and easy meals.
In high elevations, it’s important to stay hydrated with lots of water and electrolytes and eat high-carb meals that your body can metabolize quickly.
A few meals we had included: tacos, smoked sausage with rice, ramen, and hot dogs. You can be creative as you want to be based on budget.
It’s also important to pack accordingly for any long hikes. I brought a daypack and a smaller sling bag along for different distances. You will also want to pack clothes in layers. Temperatures can go from cold to warm over the course of one hike. I’d recommend bringing a base layer and down jacket along to help with layering on the trail.
Hiking Gear List and Recommendations
- Daypack (I have this one here from Mountain Warehouse)
- Sling Bag (I use this one here* from Kavu)
- Water Reservoir
- 10 Essentials (list linked here)
- Hiking Boots (I love these here from Columbia)
- Hiking/Camp Sandals (Check out these here* from Chaco)
- Base-layers
- Down Jacket
*this signifies an affiliate link. You can read more about what this means here.
Altitude Sickness
Especially if you’re coming from sea level, a road trip in Colorado is not to be taken lightly. Altitude sickness is a serious issue that can bring your trip to a screeching halt. It can happen to anyone—even people at a higher fitness level. This itinerary was designed by a Michigander aware of this concern, so you shouldn’t have any problems acclimating if you take this trip.
However, it’s important to be aware of what altitude sickness is. Read more about it here. Ahead of your trip, you should be getting enough rest and staying hydrated to help prevent any issues acclimating.
Colorado Weather
Colorado is a land of extremes in regard to weather. On your road trip in Colorado, it’s important to be aware that you can experience all seasons in one day. High elevations and what’s known as monsoon season make for unpredictable weather all year-round.
The warmer months in Colorado are short-lived, with snow clearing in the alpine for summer around mid-June and a short fall at the end of September through mid-October.
To catch wildflower season in the mountains, try to plan your trip in July or August. We went at the beginning of July and the weather was great. Although we still did get hailed on.
A big issue with summer hiking in Colorado is the monsoon season. This consists of afternoon thunderstorms that you can read more about here. The important part of this is to avoid being above tree-line in the alpine after noon. This means starting early on hikes and being prepared for getting rained out in the afternoons.
It’s very important to check the weather regularly on your road trip in Colorado, but you might notice that almost every day in the summer will indicate a chance of rain. Realize that this will likely be in the afternoon and keep an eye on weather reports when signal allows. Don’t let the rain slow down your adventures but be sure to stay safe on the trails!
Wildlife Safety
If you’re not from a mountain area, you need to be prepared for the wildlife in Colorado. Some animals to watch out for throughout the state are rattlesnakes, mountain lions, moose, and black bears.
I highly encourage doing your own research on what to do if you encounter each of these animals. To start your search, here’s some information from Rocky Mountain National Park here and some additional guidance on moose encounters here. On our shuttle tour we took, the guide suggested the best strategy for a charging moose was to play peek-a-boo behind a tree because they get bored easily.
Leave No Trace Guidelines
It’s so important that you respect the environment when visiting all these locations. If you’re not familiar with leave no trace guidelines, you can read more about the 7 principles here.
To keep it simple—take only pictures and leave only footprints. It is imperative that you pack everything out and stay on the trail to preserve the beauty of Colorful Colorado for generations to come.
Day 1: Arrive in Colorado + Black Hawk
Arrive in Colorado
Our arrival in Colorado was a 17-hour one overnight from Michigan to Colorado. Maybe yours will be less ambitious. Regardless, we arrived on Day 1 and drove through Denver and into the front range mountains. We stayed in the little casino town of Black Hawk.
Check into Coyote Motel West
For our first night in Colorado, we opted to stay at a motel as a reward for driving 17 hours overnight to get there. We ended up going on a holiday weekend when all the prices were inflated, so this was the best option we found.

While you can choose to stay anywhere in the front range or west Denver area, make sure you do proper research! Reading Google or hotel booking site reviews is very important. Some of these hotels are unsafe or poorly managed, especially in Denver.
Located next to a dispensary and pawn shop, with the hotel offices located in a liquor store, this motel normally wouldn’t have been my first choice. If I’m honest, the room décor isn’t outdated but the building itself is, with just concrete and interior paint. Non-smoking rooms are not available.
However, the price and location were right and we felt safe staying here. The lady at the desk allowed us to leave our keys so we could hit the road before the office opened in the morning. Overall, it wasn’t a bad place to crash for the night if you’re on a budget and not looking for luxury.
Online booking for this location will not work, so make sure to call and get a reservation at this number: (303) 582-5415.
Sunset at Clear Creek Canyon
We drove through Golden on the way to Black Hawk and passed through Clear Creek Canyon. On this amazing drive, you’ll pass through tunnels, see river rafters, and take in beautiful mountain views.
After relaxing at our motel and eating dinner, we went back to Clear Creek Canyon to walk a section of paved trail and catch golden hour before sunset. This was when we saw our first bighorn sheep! A double rainbow from the afternoon rain streaked across the sky, and there was nothing but good views on this short sunset adventure.
Day 2: Old Dillon Reservoir Trail + Independence Pass
After checking out of our room at Coyote Motel West, we hit the road early and went over to Idaho Springs. A road trip in Colorado typically involves a lot of driving around mountains, and we had over 5 hours of driving ahead of us.
Visit Charlie Taylor Water Wheel
We plugged Charlie Taylor Water Wheel into Google Maps and faithfully followed the directions. Even when it took us straight up a sketchy gravel road. And then we found ourselves exactly where it said, except we were at the top of the waterfall.
So don’t make our mistake when you go. Plug in Harold A. Anderson Park in Idaho Springs and take the paved trail under I-70. You’ll have to pay a few dollars to use the downtown parking, but it’s worth it.
Make sure to get here earlier in the day to enjoy the 600-foot Bridal Veil Falls as it flows into the Clear Creek River. This Bridal Veil Falls is not to be confused with the ones of the same name at Hanging Lake and in Telluride. The water wheel here is the largest in the state of Colorado, constructed in 1893 by Charlie Taylor. It’s a remnant of the gold rush history in Idaho Springs and was moved to its current location in 1946.
Hike Old Dillon Reservoir Trail

After leaving Idaho Springs, we headed west towards Frisco, CO. Here we had the goal to hike the Old Dillon Reservoir Trail. We attempted this trail the previous May but didn’t have time to finish.
This hike is the perfect acclimation hike if you’re coming from sea level. It starts at the Dillon Reservoir and takes you up to the Old Dillon Reservoir.
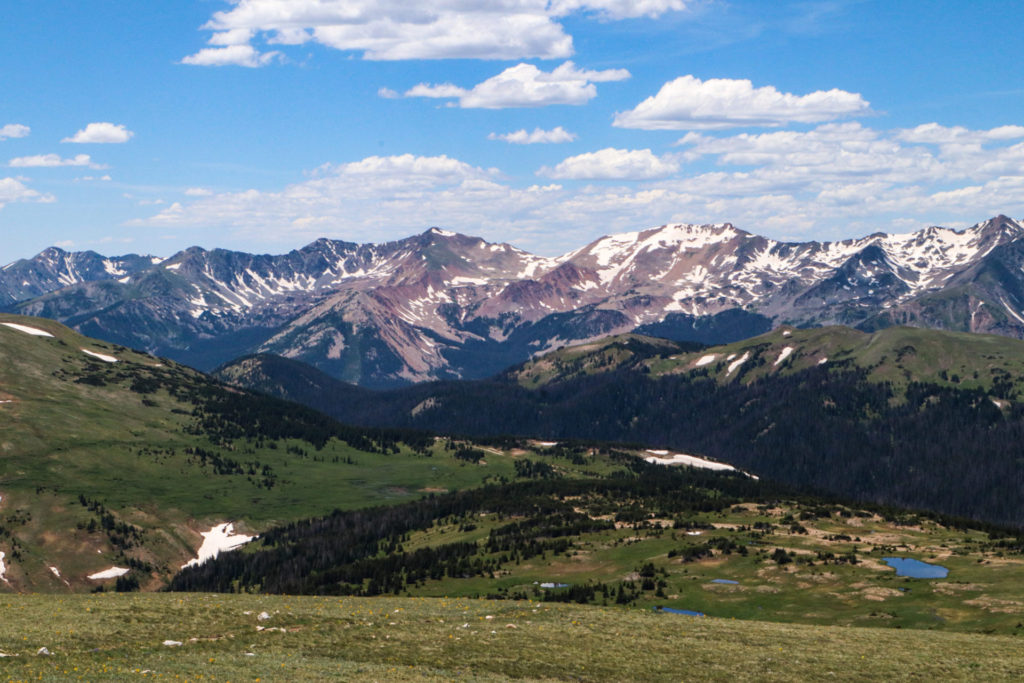
If you do this hike in the spring, you’ll see snow on the mountain peaks and a half-filled Dillon Reservoir. But when we hiked this trail in July, the blue water of the reservoir stretched on into the distance, wildflowers grew along the path, and Peak 1 and Tenmile Peak stood in the distance without their snow caps. And we even saw a military plane fly overhead while we were at Old Dillon Reservoir.
Maybe this isn’t your typical alpine pass or mountain summit hike, but this one is a hidden gem and a great way to acclimate as you enter the heart of the Rocky Mountains.
Trail Stats
- Elevation of Frisco, CO: 9,097 feet
- Distance: 1.7 miles
- Elevation Gain: 213 feet
- Trail Format: Lollipop/Look (or Out and Back)
- Difficulty Rating: Easy
Drive Independence Pass
The most important thing to know about Independence Pass is that it is a seasonal road. This scenic drive typically opens around Memorial Day and closes in early November. The best times to visit are in the warm summer months or in mid-September to early October to see the golden aspens.
Continental Divide
Independence Pass crosses over the Continental Divide with a summit of 12,095 feet. If you’re coming from the direction of Twin Lakes like we were, this’ll be one of the first major stops you see on Independence Pass.
You can take a bathroom break and get your obligatory sign picture here. There’s also an amazing overlook to check out, and a hiking trail that goes from here if you’re up for it.
Independence Ghost Town
This is a stop that we missed on our trip. While it was on our itinerary, we somehow missed it on our drive. I’d advise you to either watch the mile-markers and look for mile 58, or have specific directions plugged in before driving out of cell service.
The town of Independence originated in 1879 and was completely abandoned by 1912. The remnants of the old buildings still stand today waiting to be explored. You can learn more about Independence Ghost Town here.
The Grottos Trail
I can honestly say that I didn’t expect much from this hike. The only thing I knew about it was that there were ice caves and a waterfall. I figured ice caves meant formed by ice and it would be a cute little break while driving Independence Pass.
But I’m so glad that I was wrong. The Grottos Ice Caves have ice in them year-round. You can climb down into them and explore if you’re brave enough. We spent time in the caves and then relaxed by the Cascades waterfall at the end of the trail.
This hidden gem is a must if you’re driving Independence Pass!
Trail Stats
- Distance: 0.6 miles
- Elevation Gain: 29 feet elevation gain
- Trail Format: Loop
- Difficulty Rating: Easy

Weller Lake Trail
We opted to skip this trail and get to camp early, but this short hike looked like a great one to do on Independence Pass. I can’t say much about it personally, but I’ll leave the trail details below.
Trail Stats
- Distance: 1.1 miles
- Elevation Gain: 232 feet
- Trail Format: Out and Back
- Difficulty Rating: Easy
Camp at Little Maud Campground in Basalt
After a long day of driving, we arrived at Little Maud Campground in Basalt. The drive along Frying Pan Road was beautiful, and the views at the campground didn’t disappoint. For more information about our experience, visit my blog post about it here.
Day 3: Hanging Lake Trail + Rifle Falls State Park
We woke up bright and early on the third day of our road trip to make our 7:30 reservation an hour away in Glenwood Springs.
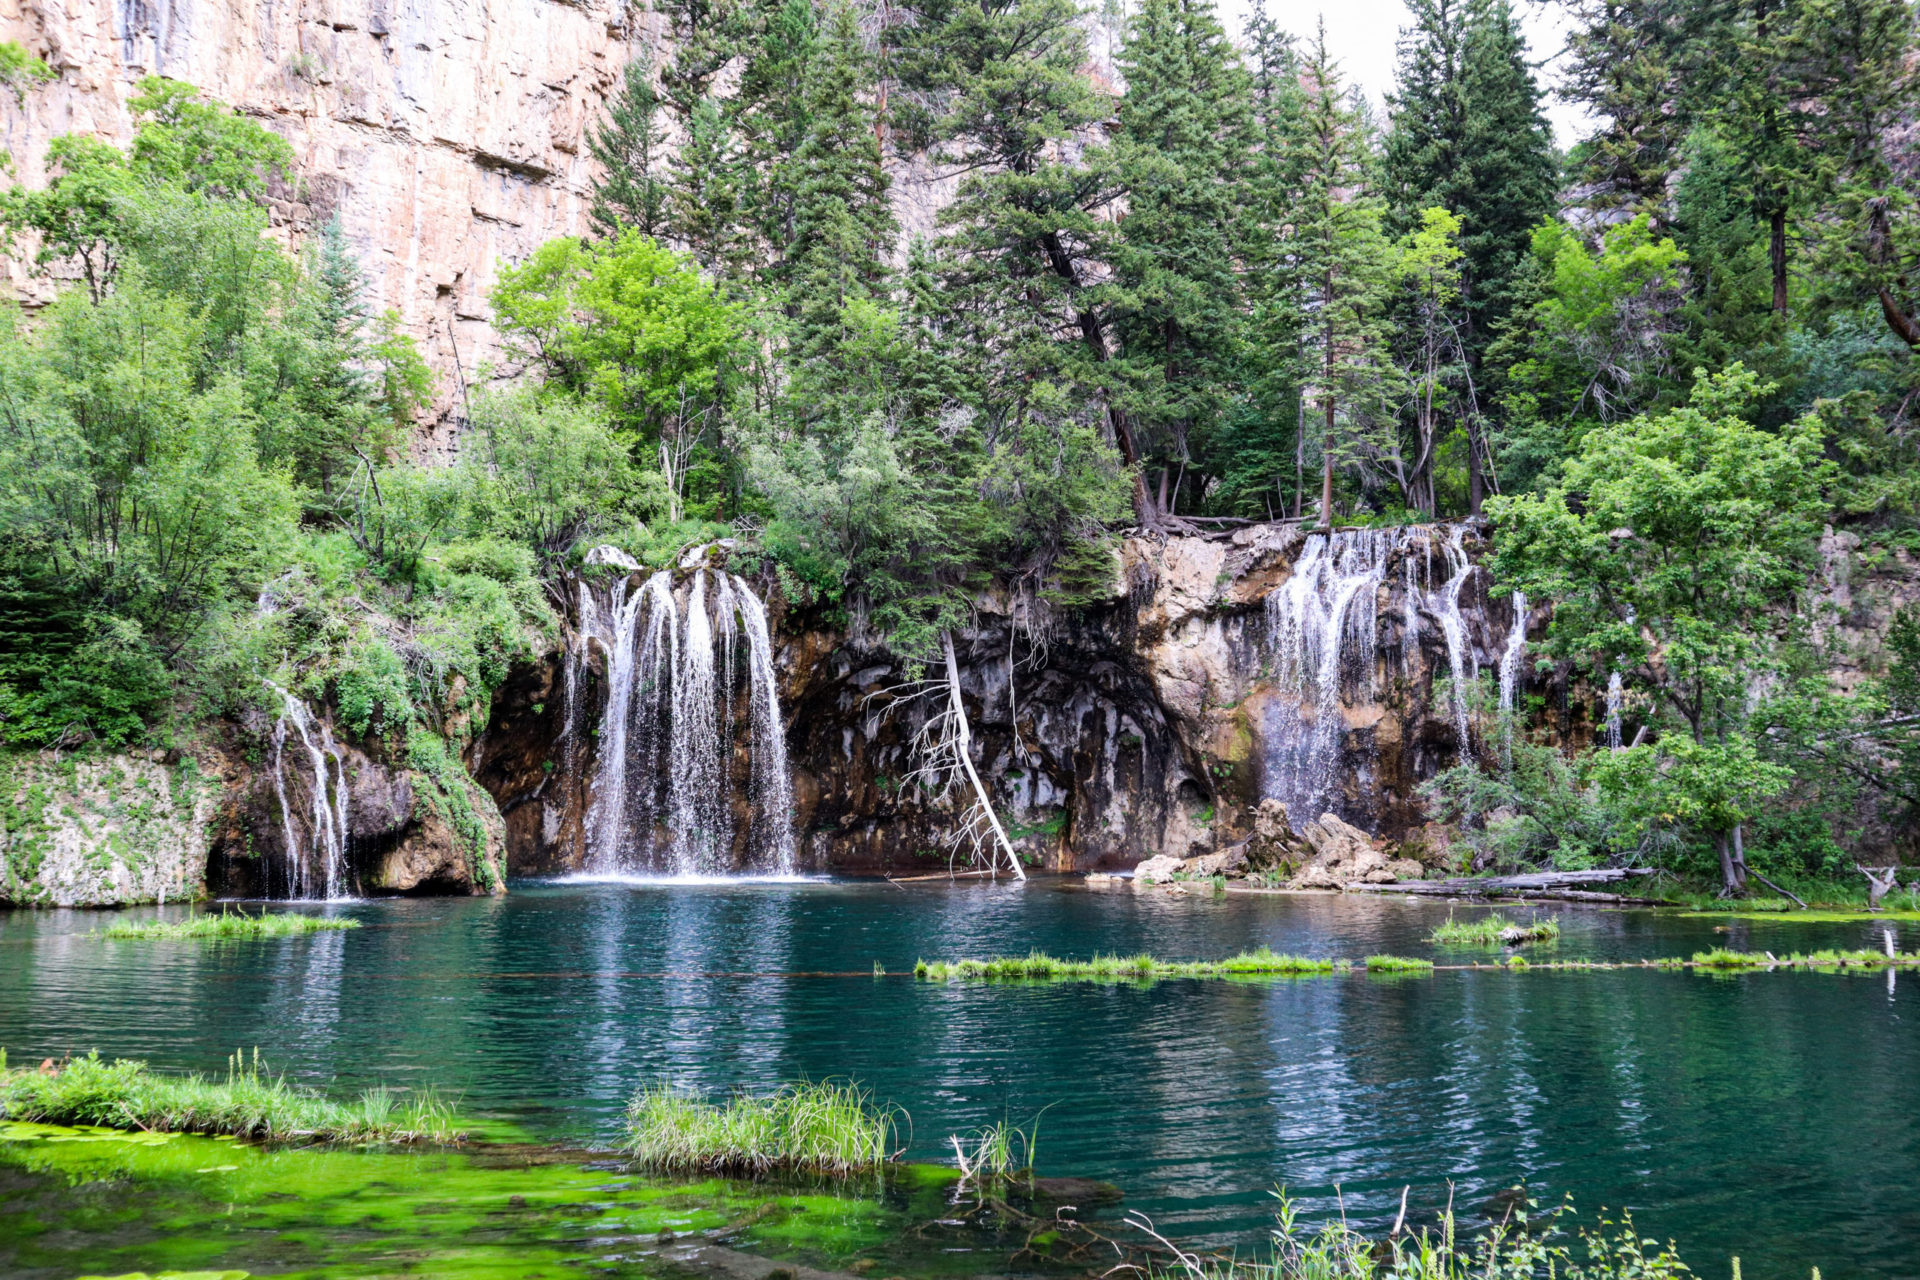
Hike Hanging Lake Trail
We had the opportunity to hike the iconic Hanging Lake Trail shortly after it re-opened. After being closed over a year due to wildfire and mudslide damage, this hike is a must if you’re near Glenwood Springs.
The views were unreal and even better than I imagined. You will need a reservation during peak months to hike this trail. For all of the details, check out my blog post about it here.
Hike Rifle Falls State Park
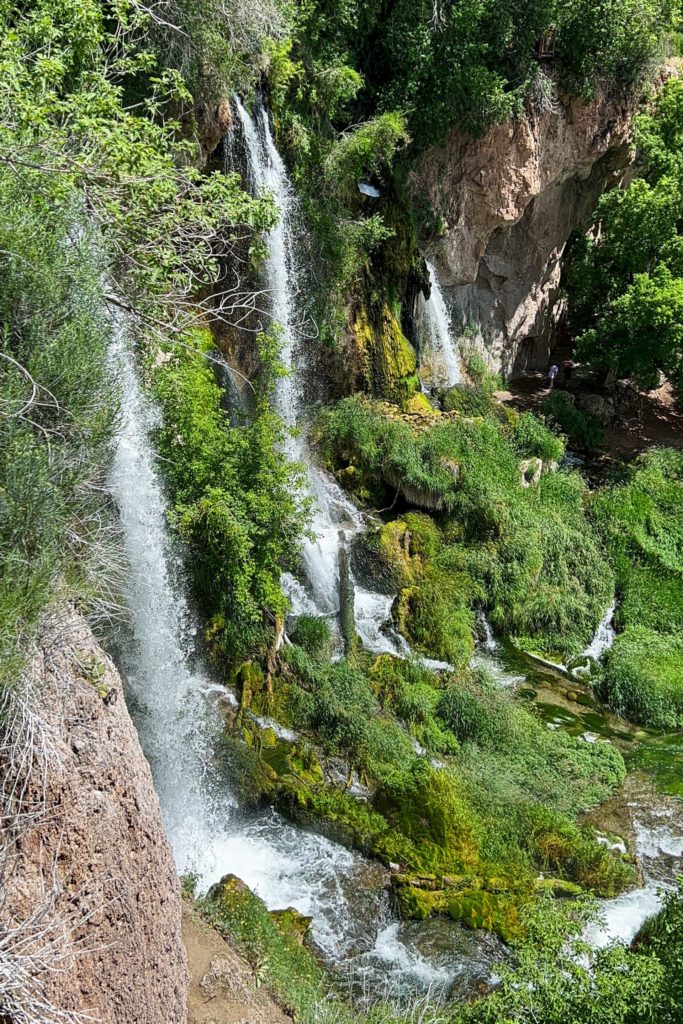
We drove well out of our way and paid a $9 entrance fee to visit this park, but it was so worth it. It’s about an hour drive from Hanging Lake Rest Area.
If you walk down the short gravel road to Rifle Falls, you can stand directly in front of it and explore there, then head up to the left. Here you can go behind one of the waterfalls and then hike up further to the caverns. You can wander in some of the bigger caverns before taking the trail down to some stairs.
Go up the stairs and follow the trail. If it looks like it’s getting too narrow, you’re going the wrong way. You’ll find a couple of overlook spots of the falls, and then the trail will bring you back down to more caverns and the other side of the falls. This was around a mile of hiking in total.
Rifle Falls State Fish Hatchery
We were searching for Riprarian Falls when we stumbled across the Rifle Falls State Fish Hatchery. After wandering in through the open gates, the kind lady working there offered us buckets of fish food and directed us to which fish we should feed.
Feeding fish isn’t normally my thing, but there’s something about doing it in the mountains. This is a great little stop to mix things up, especially if you’re traveling with kids.
You can read more about what they do here.
Drive Through Rifle Mountain Park
After the lady at Rifle Falls State Fish Hatchery learned that we were climbers, she was more than excited to point us in the direction of Rifle Mountain Park. This park is supposed to have some of the best sport climbing in the state of Colorado.
If you want to stop and do some climbing of your own, there’s a $5 day pass required. If you’re just driving through to see the climbers, you can do that for free. Drive until you don’t see climbers anymore and then turn around and head back!
The gravel roads here do get narrow, so use caution when driving through.
Optional: Shower at Carbondale Recreation Center
We opted for a refresh at Rifle Falls, but our shower option for this day was at the Carbondale Recreation Center. This was an optional stop on the hour and a half drive back from Rifle to our campground in Basalt. Day passes for the rec center are $7 and give you access to the showers and other facilities. Don’t forget to check the open hours before visiting!
Day 4: Maroon Bells + Basalt
Day 4 brought another early morning for us. We drove almost an hour to the Aspen Highlands Ski Resort in Aspen to catch our 8 am Maroon Bells Shuttle.
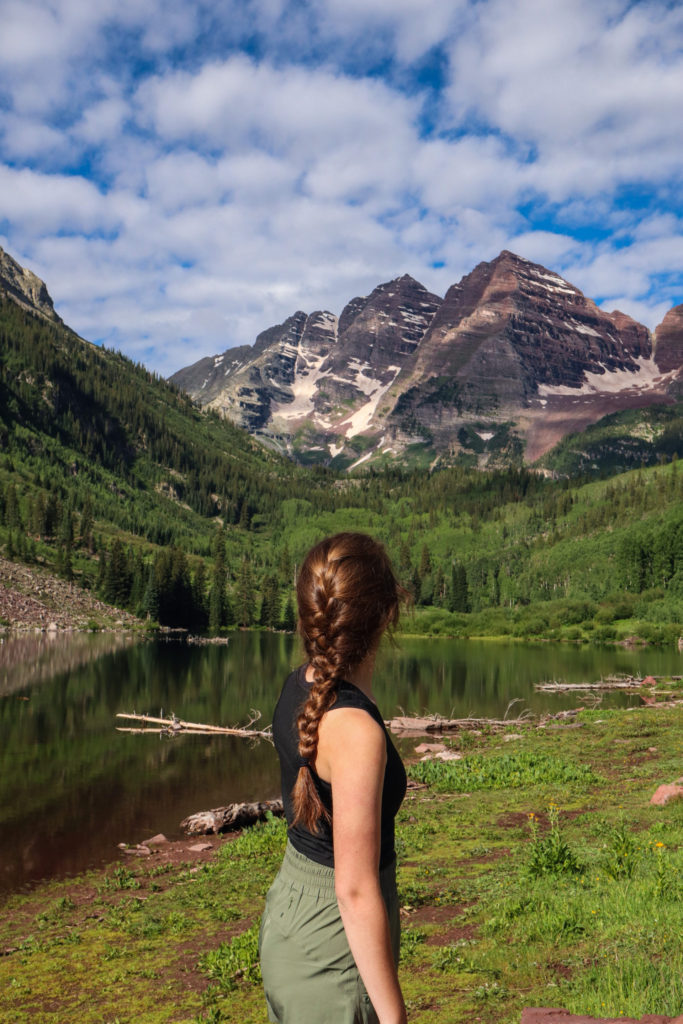
Hike Crater Lake Trail at Maroon Bells
If Maroon Bells isn’t on your hiking bucket list, run, don’t walk, to add it right now. Whether you’re exploring in the summer months, chasing golden aspens in the fall, or braving the cold in the winter, it’s impossible to go wrong with adventuring here.
For everything you might need to know before visiting, check out my blog post about it here.
Explore Downtown Basalt
One of my friends needed signal for an important phone call, so we took the opportunity to explore Downtown Basalt in the afternoon. This is the cutest little mountain town.
The town ice cream shop was closed that day, so we found some ice cream in the back of a bike shop. And my favorite stop was probably Skip’s Farm to Market. I got the best kombucha here. And all of their products are locally sourced! Check them out here.
Day 5: Saint Mary’s Glacier + Boulder Falls
After packing up camp we drove east with a 6-hour drive ahead of us. One thing to know about taking a road trip in Colorado is that long drive days are inevitable.
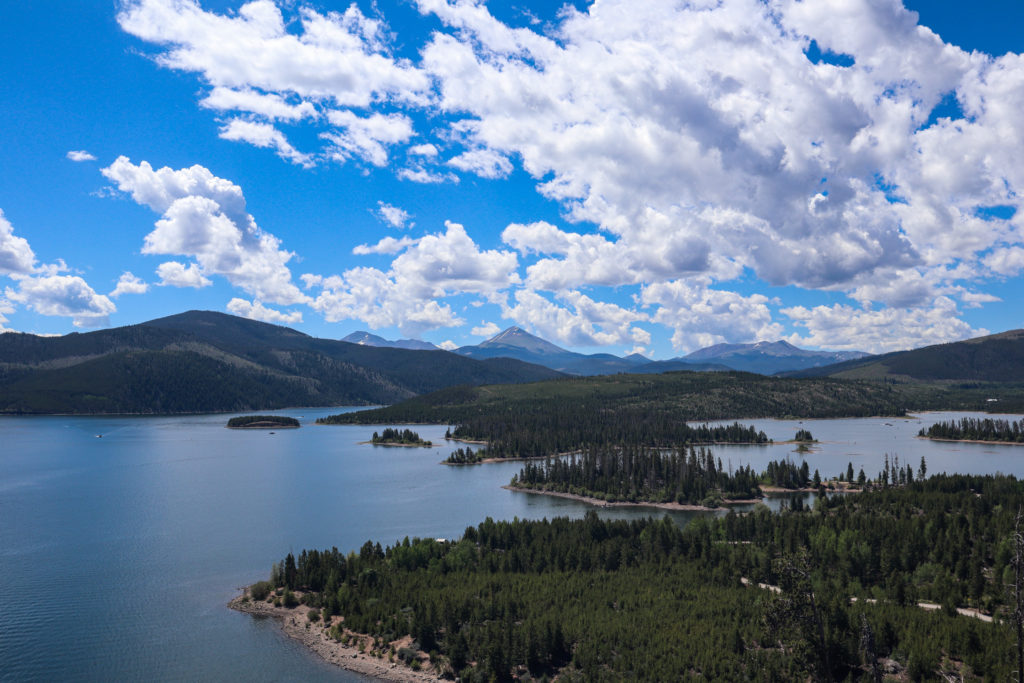
Stop at Sapphire Point Overlook
Our first stop on our way east was in Frisco, Colorado at Sapphire Point Overlook. This overlook offers stunning views of the Dillon Reservoir with a scenic loop to take it all in. This is a popular overlook that has seen some abuse. Please respect the wildlife and do not feed any animals. When we went, we saw a fox wandering dangerously close to children because people were feeding the chipmunks.
Despite issues with wildlife, this was a great stop to stretch our legs as we continued east.
Hike Saint Mary’s Glacier

This popular hike is worth the hype! After leaving Frisco, we headed east towards Idaho Springs to do this trail. Getting here early or on a weekday is ideal, as the parking lot can fill up fast. You’ll need to bring $5 cash and a pen to park here.
The trail itself starts just down the road from the trailhead. It starts out steep and then takes you to Saint Mary’s Lake at the base of the glacier. You can swim here, but I’ll warn you—even in July the water is freezing. From there you can climb up to the top.
Actually not a glacier at all, this permanent icefield can be tricky to navigate even in the summer. I’d recommend hiking boots with good tread or even microspikes. We saw people skiing down this, but butt-scooting down is also a solid option.
We only went to the ridge that overlooks the lake. Storms were rolling in and we didn’t have time to go any further.
Trail Stats
- Distance: 2.4 miles
- Elevation Gain: 1,030 feet
- Trail Format: Out and Back
- Difficulty Rating: Moderate
James Peak
If you’re up for more of a challenge, you can also summit James Peak here. This is a 13er that is up the trail from the top of Saint Mary’s Glacier. To go all the way to James Peak and back, you can expect between 8-10 miles (based on reviews) and around 3,000 feet of elevation gain, This hike is best experienced in the summer, and must be started early to avoid afternoon monsoons.
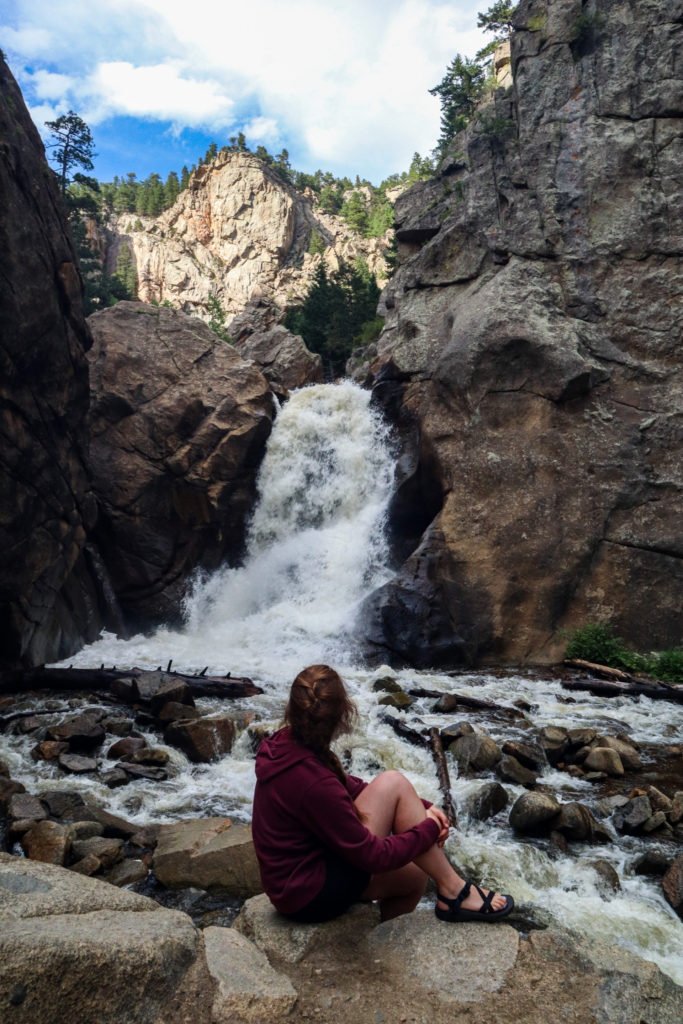
Visit Boulder Falls
Boulder Falls is barely a hike, but the stop is more than worthwhile. Falling 70 feet into Boulder Creek, Boulder Falls is one of the easiest waterfalls to access in Colorado. A short trail leads you to the falls where you can sit along the rocks near the creek. This is one of those waterfalls that are so loud you can’t hear anything else.
Please do exercise cation by the water though! A sign will tell you that there have been deaths here so this shouldn’t be taken lightly. Be respectful of these guidelines and watch your step.
You’ll park alongside Boulder Canyon Drive, which can be tricky to pull out of due to limited visibility.
Trail Stats
- Distance: 0.3 miles
- Elevation Gain: 52 feet
- Trail Format: Out and Back
- Difficulty Rating: Easy
Stay at Estes Park Campground at Mary’s Lake
This driving day was an eventful one, and we checked into our next campground pretty exhausted. This beautiful campground is Estes Park Campground at Mary’s Lake. Located in Estes Park, this campground has all of the amenities you could need and is the ideal basecamp for your Rocky Mountain National Park adventures. You can read all about it on my blog post here.
Day 6: Hiking in Rocky Mountain National Park
It’s not a proper road trip in Colorado without stopping at Rocky Mountain National Park (RMNP). One of four in the state of Colorado, this one is the most popular both in the state and the United States. But it’s popular for a reason and you can’t miss stopping here on your trip! This was an extremely early morning for us as we headed there to explore the park.
Rocky Mountain National Park Timed Entry Permit System
Before you head for Rocky Mountain National Park, there’s something you should know. In addition to the existing requirement for purchase of either an American the Beautiful Pass, day, week, or annual pass for the park, you will need a permit.
The timed-entry system runs from the end of May to mid-October. Permits are released in two batches, a month before and the night before.
There are two permit options. One provides park access for everything but Bear Lake Road, and the other includes Bear Lake Road. They are divided into two-hour entry windows as follows:
- Option 1: 5am-6pm Park Access with Bear Lake Road
- Option 2: 9am-3pm Park Access, No Bear Lake Road
A permit is not required for entry outside of these time intervals. Most of the popular hikes are located on Bear Lake Road, so you’ll want to snag any permits for hiking there as early as possible.
Hike at Bear Lake Road Corridor
On our first day in Rocky Mountain National Park we woke up before 4 am and drove a half hour to the Bear Lake Trailhead. The closest entry point for this part of the park is the Beaver Meadows Entrance Station. We didn’t have an early timed-entry permit, so we entered the park and got to the trailhead before 5am.
After napping in the car and boiling water for oatmeal in the parking lot, we hit the trail. The route we took isn’t a conventional one you’ll find on Alltrails.
I provided the trail stats below the best that I could, but you’ll want to follow along with my description to take this route. If you take this trail, you’ll see Nymph, Dream, Emerald, and Bear Lakes, Lake Haiyaha, and Alberta Falls, along with many spectacular views along the way. I would also recommend downloading the Bear Lake Corridor Map or carrying a physical copy to follow this route.
And before you hit the trail, I’ll issue a word of warning. There are many lakes along this route, but RMNP does advise visitors that there are leeches found in many of the lakes in the park. We weren’t brave enough to try swimming given this warning, so dive in at your own risk.
Trail Stats
- Distance: 8-10 miles
- Elevation Gain: 1,000+ feet
- Trail Format: Loop
- Difficulty Level: Moderate
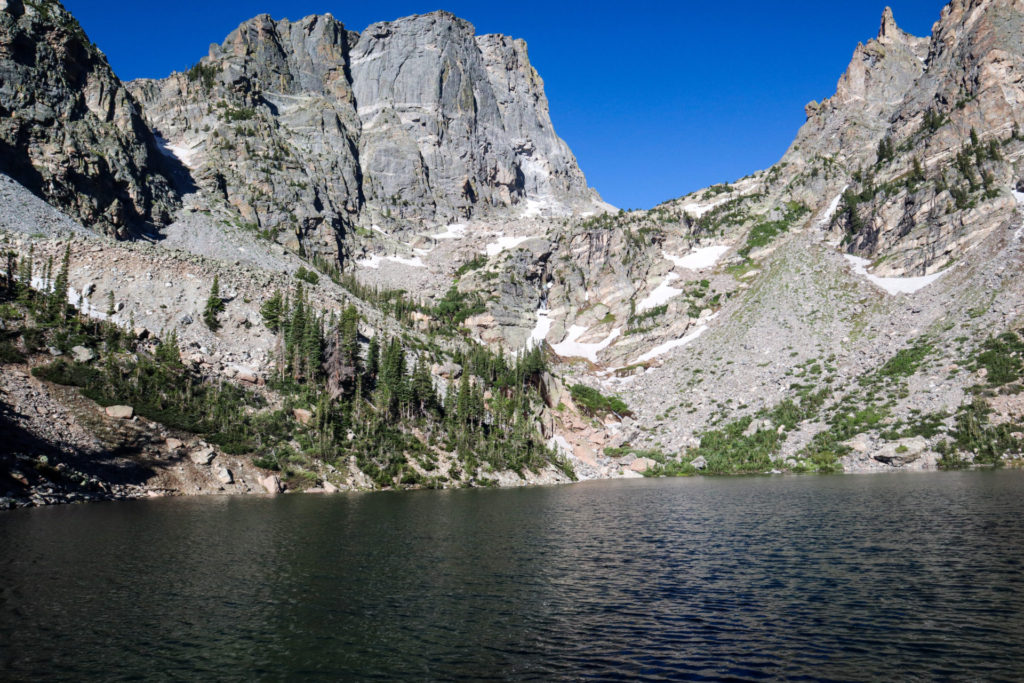
Emerald Lake Trail
We started out from the Bear Lake Trailhead and headed in the typical direction for the Emerald Lake Trail. You’ll want to do this part of the route first as early in the morning as possible to beat the crowds. This trail took us to Nymph, Dream, and finally Emerald Lake. From there you’ll backtrack to before Dream Lake and find the intersection that points towards Lake Haiyaha.
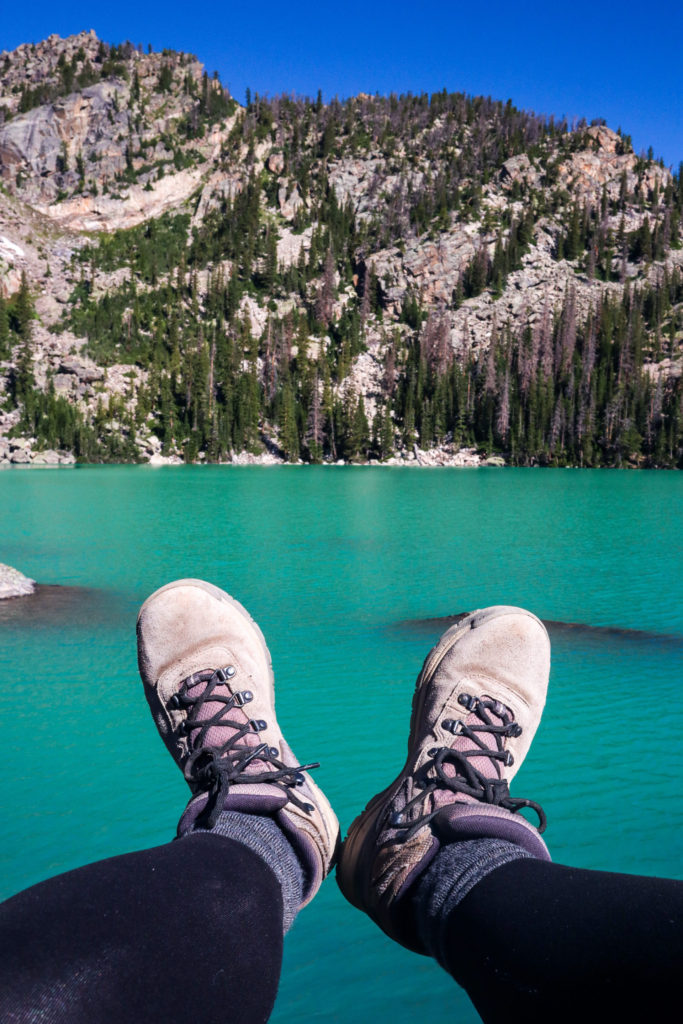
Lake Haiyaha
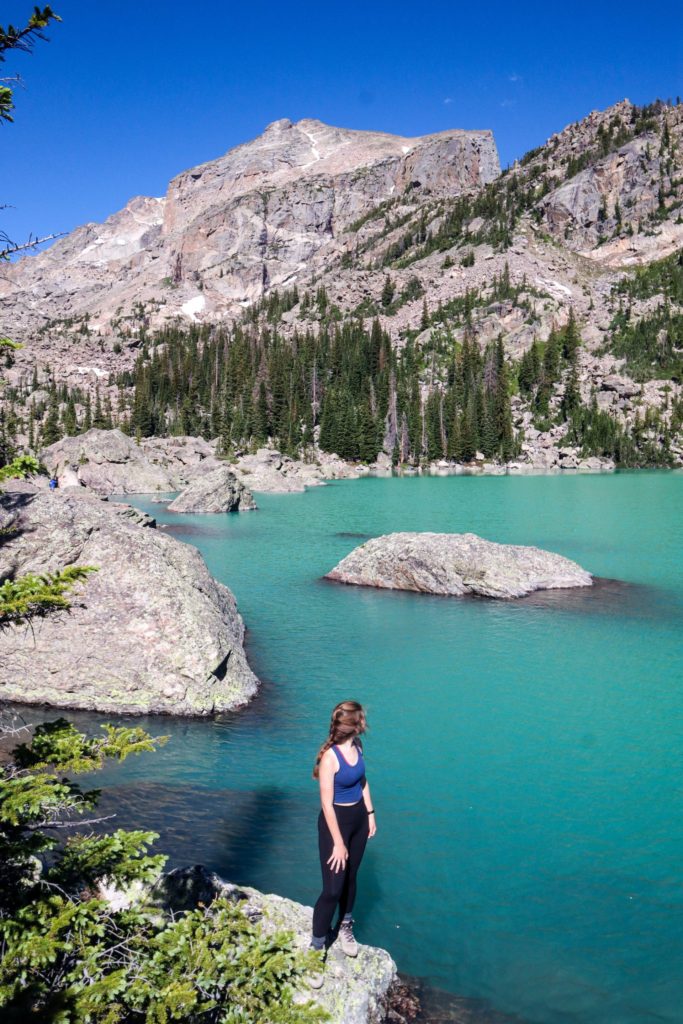
After a steep climb and some bouldering to get to the edge of the lake, we made it to Lake Haiyaha. The lakes along the Emerald Lake Trail get all of the hype, but this lake was my favorite. We were fortunate enough to visit in July of 2022, shortly after the landslide on Hallett Peak that overlooks the lake. This caused glacial dust to break free in Chaos Canyon and summer rains washed it into Lake Haiyaha and Chaos Creek.
The landslide happened only days before we visited, and the unique color you see pictured only became more milky as the summer went on. Conditions are uncertain, but it’s unlikely that you expect this color when you visit in following years.
Alberta Falls
I had actually planned for us to hike back to the trailhead and then hike an out-and-back to Alberta Falls but we decided on the trail to change course. There’s some backtracking from Lake Haiyaha to the previous intersection and then you’ll take the remaining fork in the trail.
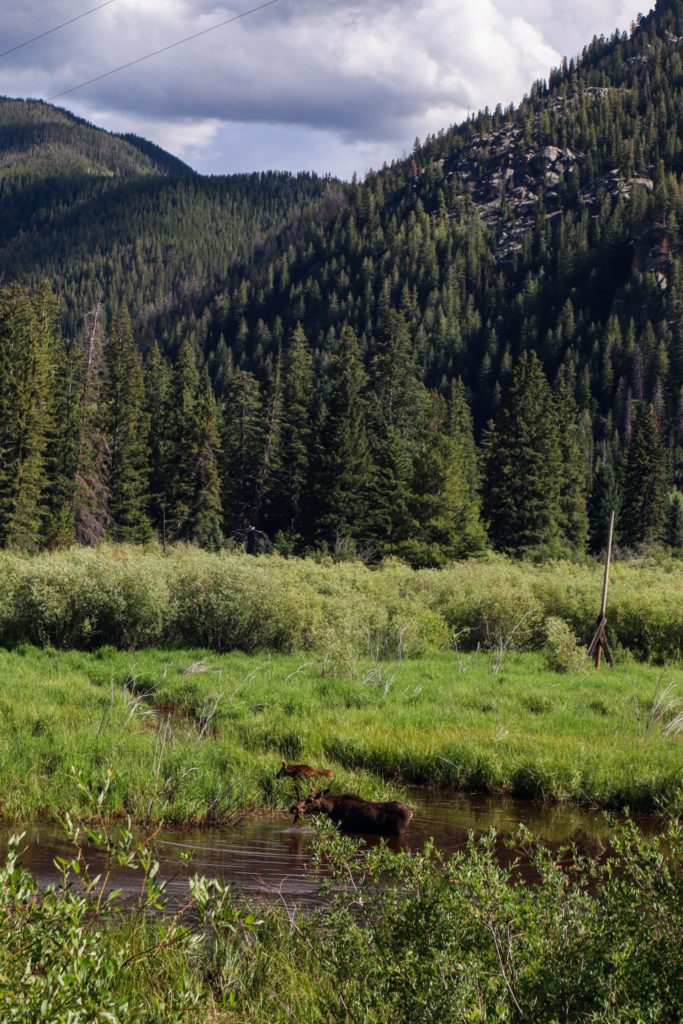
From here you’ll go down towards the forest floor. This is where we saw a moose and her baby, up close and personal. A little too close, honestly. According to a park ranger we talked to later, A6 and A7 like to wander onto the trail in this area. The moose we saw was tagged as A7.
From there we followed the signs to Alberta Falls. This incredible waterfall plummets 30 feet down into Glacier Creek. It’s an iconic first stop on the hike to Sky Pond. You’ll hear it long before you see it but stop and enjoy the views for a while when you get there.
Bear Lake
We headed back towards the Bear Lake Trailhead from Alberta Falls. There was a bit of an uphill climb involved getting back. After getting back to the trailhead, we walked over to get a view of Bear Lake. There’s also a hike around the lake, but just this view was enough for us. Then we loaded up and headed out of the park for the day, exhausted but excited about all the epic views we’d seen. In total, we were on the trail for around 5 hours, including all of our stops along the route.
Explore Downtown Estes Park
Back at our campground, we took advantage of the pool and the showers before heading into Downtown Estes Park. This cute downtown has all the touristy shops you could ever want to explore. We got souvenirs and explored the area for the afternoon—and even got hailed on.
Day 7: Driving Old Fall River Road + Trail Ridge Road in RMNP
For our second day exploring Rocky Mountain National Park, we opted for more driving and less hiking. We were pretty sore from all of the hiking the previous day, and this gave us an opportunity to see more of the park without having to deal with Bear Lake Road restrictions again.
We packed up camp and entered before 9 am, but timed-entry permits for the park without Bear Lake Road are much easier to get. However, you’ll want to consider how long you want to wait to get into the park, especially during the weekend. The earlier you get there, the better.
Drive Old Fall River Road
We entered at the Fall River Entrance so we could drive Old Fall River Road. This scenic drive is only open from the beginning of July to the beginning of October. This meant that it opened only a few days before our trip.
This seasonal road is a one-way, so you must enter from the end near the Fall River Entrance. It is a dirt road with switchbacks that take you up almost 3,000 feet in elevation. And they’re not a fan of guardrails in Colorado.
You’ll want a dependable vehicle if you choose to drive this road, but it is well worth it. Although I’ll be honest—I did get to enjoy this drive from the comfort of the backseat.
Hike to Chasm Falls
The first stop we made along Old Fall River Road was Chasm Falls. When the road is closed, many people hike Old Fall River Road to see this waterfall, but we were able to park alongside the road and make the steep walk down. While it’s not universally accessible, this isn’t much of a hike down to the falls.
Chasm Falls is a 25-foot drop in the Fall River. If you’re driving Old Fall River Road, this stop is a must.
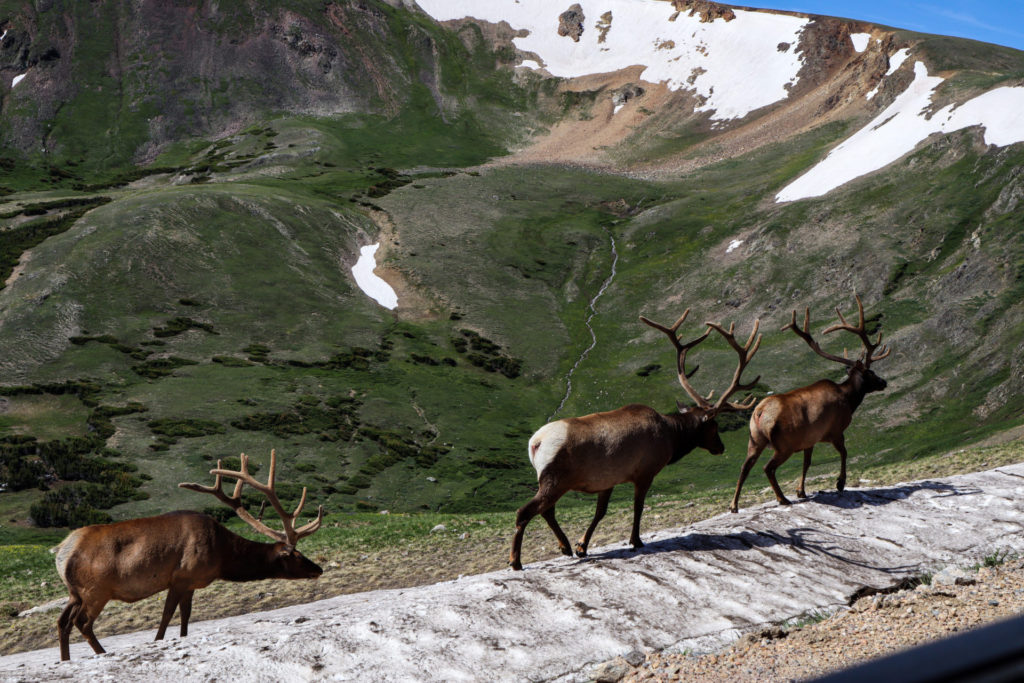
Visit Alpine Visitor Center
Just before the visitor center, we saw the most spectacular sight. Elk had gathered along the road and were just feet away from our vehicle. It seems like the herd likes to hang out in this high elevation area of the park, so be on the lookout.
Old Fall River Road ends at the Alpine Visitor Center. This visitor center actually sits at the highest elevation of any other in the National Parks System. This also means that is only open for a few months a year.
Inside you’ll find a gift shop and small café. It’s worth a look around. And just outside you will find an overlook of the alpine tundra.
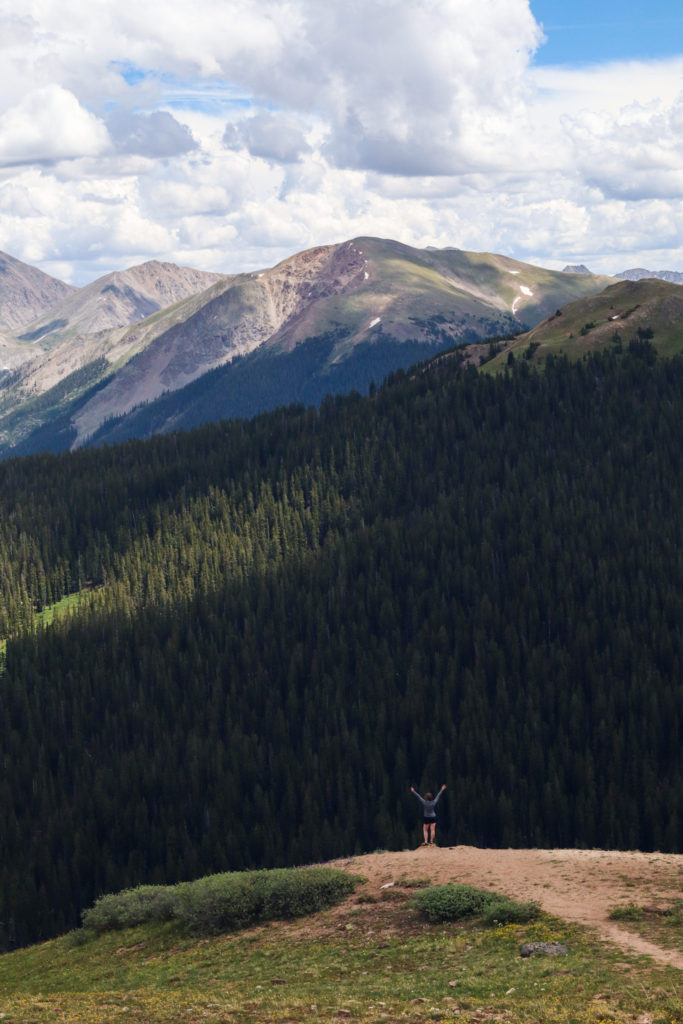
Hike Alpine Ridge Trail
The Alpine Ridge Trail is short and steep, but worth it. It’ll take you to an elevation of 12,095 feet and some pretty amazing views. You can even see the Medicine Bow Mountains that are in Wyoming from this vantage point.
The air does get thin up there though, so take your time on the ascent.
Trail Stats
- Distance: 0.7 miles
- Elevation Gain: 147 feet
- Trail Format: Out and Back
- Difficulty Rating: Easy
Drive Trail Ridge Road
From the Alpine Visitor Center, you can either head towards Estes Park or Grand Lake on Trail Ridge Road. We opted to drive further towards Grand Lake.
Trail Ridge Road is only open from the end of May to the end of October. It’s the highest continuously paved road in the United States and offers nothing but spectacular views along the drive. At it’s highest point, the road goes to an elevation of 12,183 feet.
Here’s the list of overlooks we stopped at:
- Medicine Bow Curve
- Continental Divide
- Fairview Curve Viewpoint
Hike Colorado River Trail
We decided not to drive all the way to Grand Lake and hike to Adams Falls like we originally planned. If you choose to do this, it’ll add on another hour of driving if you’re headed back to Estes Park like we were.
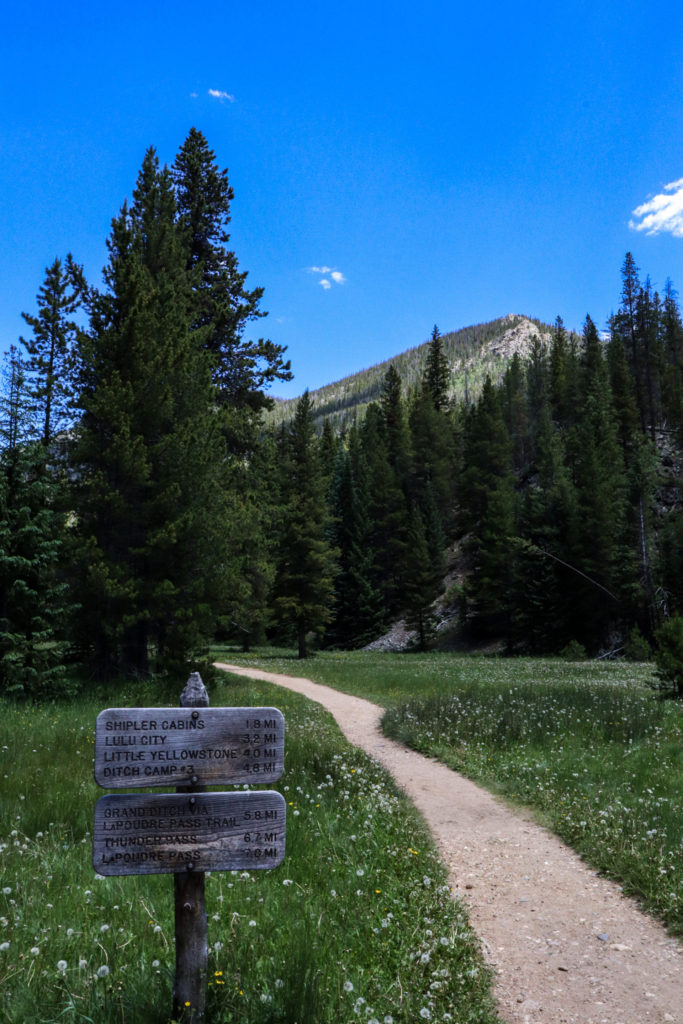
Instead, we stopped off at the Colorado River Trail. When I went to Rocky Mountain National Park on my first ever road trip in Colorado the previous year, we didn’t know that Trail Ridge Road was seasonal. We showed up in May at the Grand Lake entrance and the ranger suggested this trail.
It was out of sentimental reasons that we hiked part of this trail, but it is a beautiful hike. At this point we’d seen alpine lakes, tundra, and snow-capped peaks within the park. This brought us down under 10,000 feet in elevation to the forests and the trail winds along the Colorado River.
We only hiked a short distance to the first intersection at the bridge, but there are many options for hiking here.
Driving Back Towards Estes Park
After leaving the Colorado River Trailhead, we drove back towards Estes Park.
Here are the essential stops along the way:
- Gore Range Overlook
- Lava Cliffs Overlook
- Optional: Toll Memorial via Tundra Communities Trail (1 mile, easy hike)
- Forest Canyon Overlook
- Rainbow Curve Overlook
- Many Parks Curve Overlook
- Beaver Ponds Overlook
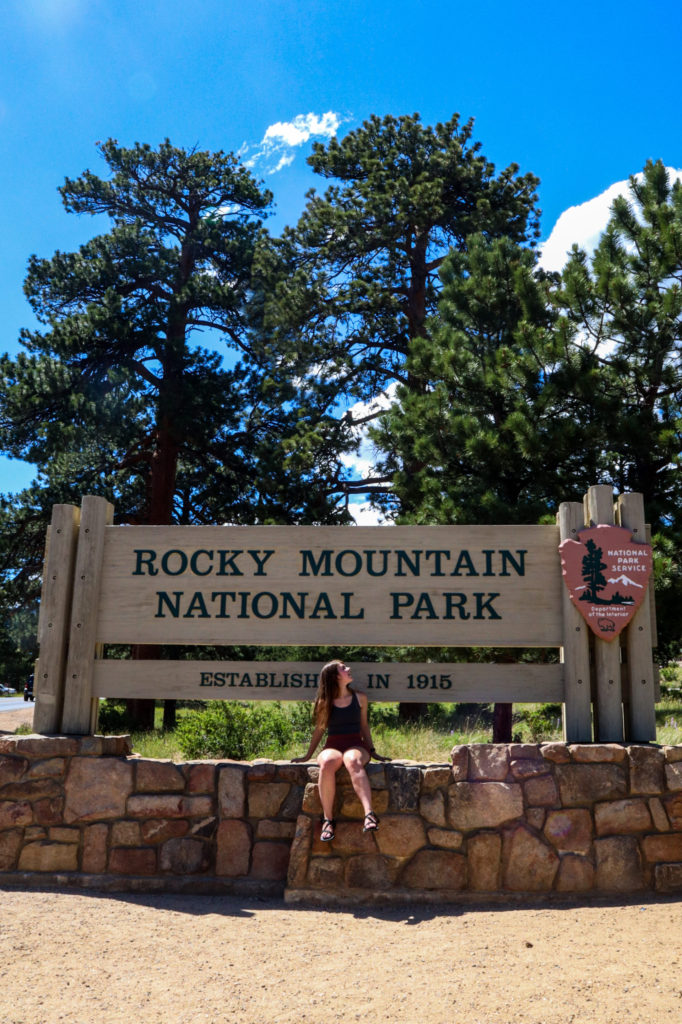
We left the park through the Beaver Meadows Entrance Station and stopped for a picture with the Rocky Mountain National Park sign. This sign has a great pull-off spot and is an awesome one for getting your picture to prove that you were there.
And that concludes our epic road trip in Colorado! From there we drove around 17 hours back overnight to Michigan, but this is where your guided road trip itinerary ends.
Colorado Road Trip Cost Breakdown
This road trip in Colorado was very budget-friendly. As a college student that has to be mindful of how much my friends and I are able to spend, most of my choices were budget-oriented.
Here’s how we kept costs down: mostly camping, repeating meals or doing simple meals, minimizing eating out, mostly free activities, driving overnight, using fuel rewards when filling up, and bringing food and other supplies from home.
Cost Breakdown for 3 People:
- Entry Fees, Parking, and Permits: $138
- Firewood: $33
- Food: $172
- Accommodations: $328
- Gas: $696
- Trip Total: $1,367
- Total Per Person: $455
I do have to mention that I had a friend join us for a night in Colorado. She paid for her share of a night at the campground and contributed to parking at Maroon Bells. Except for a couple of souvenirs and individual purchases, this is the cost-breakdown for all group expenses.
And if you didn’t have to drive 17 hours one-way to get to Colorado, just think of how cost-effective this trip could be for you. Comment below if this total surprised you!
Locations and Hikes for this Road Trip in Colorado
To find all the locations I mentioned for an epic road trip in Colorado, check out my Google Maps list here.
I also compiled all of the hikes mentioned into a list on Alltrails. Please note that some of these hikes are just the closest that I could find. Use Alltrails for reviews and as a guide, but I don’t advise relying on it fully. Find the list of trails here.
Now that you’ve seen the full itinerary, let me know what you think! Would you take this road trip in Colorado?
Like this post? Pin it for later!

More From Colorado
- Michigan Weekend Trip: Adventure and Relax in East Jordan

 FacebookTweetPin In Michigan and looking for a trip to take this summer? Look no further than this Michigan weekend trip in East Jordan, Michigan. This trip is perfect to take solo, with your significant other, or with your best friend. This trip is also a great one for the spring or fall. Table of Contents …
 - Best West Michigan Hiking Trails: The Story of My Senior Project

 What are the best West Michigan hiking trails? I set out to answer this question and created an eBook guide to share what I found.
 - How to Spend a Fun Morning at Tulip Time in Holland MichiganWhat’s the best way to experience Tulip Time in Holland, Michigan? Steal my personal itinerary and read more about this unique festival.


Other Blog Posts
- Michigan Weekend Trip: Adventure and Relax in East Jordan
- Best West Michigan Hiking Trails: The Story of My Senior Project
- How to Spend a Fun Morning at Tulip Time in Holland Michigan
Affiliate Link Disclosure: The symbol “*” signifies any links that are affiliate links. This means that I earn commission if you choose to buy something from these links. This comes at no additional cost to you and enables me to keep putting out content for you. If you choose not to purchase through these links, that’s fine too!


My husband and I are in Frisco and are always looking to hike new places, this is such a great guide!!
Thank you so much! I hope you’re able to check out these spots!